Step-by-Step Process of Installing Synthetic Grass: Tips from the Pros
 Synthetic grass is a low-maintenance option that will keep your lawn green all year round. It may seem difficult to install synthetic grass, but if you follow the instructions and use professional advice, you will achieve an amazing result. This step-by-step tutorial will help you get through the installation process.
1. Planning and Measuring
Plan the area where you will install the artificial grass. Allow a few inches extra for trimming and fitting. Sketch a rough layout to help visualize it, taking into account any obstacles such as trees or pathways.
2. Clearing and Preparing Ground
Remove all debris, such as rocks and grass. This task can be made easier with a sod cutter. After clearing the area, dig down to about 3-4 inches. This will ensure a strong base for your artificial grass. Use a weed-killer to kill any future weeds that may disrupt your lawn.
3. Installing a Base Layer
For the appearance and longevity of your artificial grass, a well-prepared base will be crucial. Spread crushed rock or decomposed stone evenly over the entire area. Aim to achieve a layer of crushed rock or decomposed granite that is 2-3 inches thick. Utilize a plate compactor for a stable and smooth surface. Check for low spots, and fill in as necessary.
4. How to Lay a Weed Barrier
Install a weed-blocking fabric over the compacted foundation to prevent weeds growing through your artificial grass. It is important to maintain the look of your lawn. Landscape staples are used to secure the fabric.
5. Unrolling the Synthetic Grass and Cutting it
Unroll the artificial grass and allow it to acclimatize for a couple of hours. This will reduce wrinkles. Cut the grass carefully to match the shape of the yard. Allow a bit extra at the edges. For clean, precise cuts, use a utility knife.
6. Joining Seams
You’ll have to join the seams if you need multiple rolls of artificial grass. Trim the edges to ensure a tight fit. Sew the seams with adhesive and seam tape, pressing firmly down to ensure a good bond.
7. Secure the Grass
Secure the synthetic grass edges with nails or landscape staples, separating them by 6-8 inches. Stretch the synthetic grass to create a smooth, wrinkle-free surface.
8. Add Infill
Infill cushions the grass blades and helps them stand. Use a drop spreading tool to evenly distribute the infill across the grass. Brush the grass with stiff bristle brooms to settle the infill and help the blades stand up.
9. Final Touches
Brush the grass again to give it an organic look. Check for areas that require adjustment. Trim the excess grass at the edge and clean up the area. Now that you have a new lawn, it’s time to enjoy it!
Conclusion
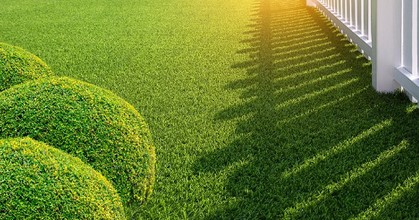
Installation of synthetic grass requires careful planning and precision. Follow these tips and tricks to create a lush green lawn with minimal maintenance that looks great all year round. Synthetic grass is a great solution for playgrounds and pet areas, and to improve the aesthetics of your yard.
This post was written by a professional at NoCo Turf Co. NoCo Turf Co., based in Windsor, CO, is your synthetic grass store and synthetic turf installers near you. We proudly serve Fort Collins, Windsor, Johnstown, Berthoud, Erie, and surrounding areas. Specializing in Synthetic grass turf installations, we offer a wide range of services, from dog runs to residential installs and PGA-style putting and chipping greens. Additionally, we provide wholesale options for DIY enthusiasts and local landscapers. Whether you’re looking to enhance your home or business, NoCo Turf Co. delivers exceptional quality and expertise for all your synthetic grass needs. Choose https://nocoturf.com/ as your artificial turf installer near you for a maintenance-free lawn you’ll love. Visit the Brick and mortar location today!