Step-by-Step Instructions for Building Flower Boxes on a Budget
Building flower boxes is a delightful and creative endeavor that allows you to blend the beauty of nature with your own craftsmanship. These charming containers offer a perfect canvas to showcase your favorite blossoms, transforming any space into a colorful and inviting oasis. Whether you’re a seasoned DIY enthusiast or just starting, crafting flower boxes can be both a rewarding project and a wonderful way to enhance the aesthetic appeal of your surroundings.
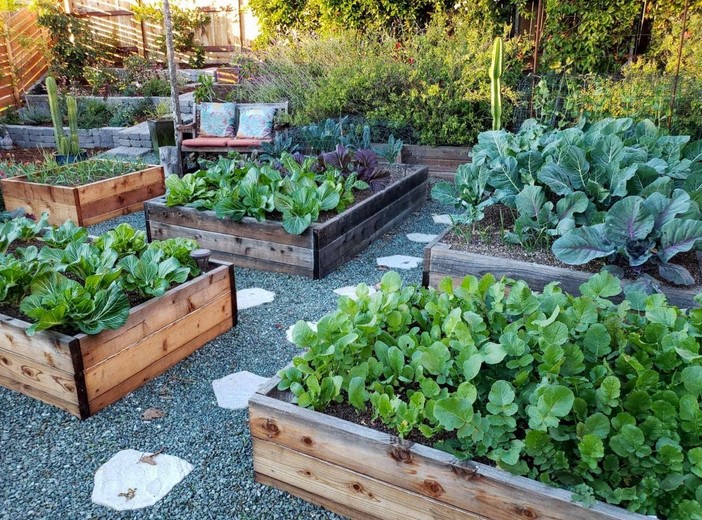
When it comes to adding a touch of beauty and nature to your outdoor space, flower boxes are an excellent choice. Not only do they provide a charming aesthetic, but they also allow you to cultivate a mini garden in even the smallest of spaces. Building flower boxes doesn’t have to break the bank – with some creativity and basic tools, you can create stunning planters that enhance your home’s curb appeal. In this guide, we’ll walk you through a step-by-step process to build flower boxes on a budget.
Materials You’ll Need:
1. Wooden Planks: Opt for budget-friendly wood like pine or cedar. The dimensions will depend on the size of the flower boxes you want to build.
2. Screws or Nails: Choose corrosion-resistant screws or nails to ensure the longevity of your flower boxes.
3. Measuring Tape: Accurate measurements are crucial for a successful project.
4. Saw: A simple handsaw or a circular saw will suffice for cutting the wood.
5. Drill: Needed for making holes and securing screws.
6. Landscape Fabric: This will line the inside of the box to prevent soil from falling out while allowing water drainage.
7. Potting Soil and Plants: Select plants that thrive in your climate and sunlight conditions.
8. Paint or Stain (Optional): Enhance the aesthetics and protect the wood by painting or staining it.
Step-by-Step Guide:
Step 1: Planning and Measurements
Begin by determining the dimensions of your flower boxes. Consider the space where you intend to place them – whether it’s a windowsill, porch railing, or garden bed. Measure and mark the lengths of the wooden planks you’ll need for the front, back, and sides of the box.
Step 2: Cutting the Wood
Using a saw, cut the wooden planks according to your measurements. If you’re not comfortable cutting the wood yourself, many hardware stores offer cutting services. Remember, precision is key for a snug fit.
Step 3: Assembling the Box
Lay out the cut pieces to form the sides, front, and back of the box. Use a drill to create pilot holes before attaching the pieces with screws or nails. This prevents the wood from splitting. Assemble the box by attaching the front and back panels to the side panels. Make sure the box is square and even on all sides.
Step 4: Adding a Bottom (Optional)
For a more traditional look, consider adding a wooden bottom to your flower box. This provides a solid base for your plants and prevents water from dripping onto surfaces below. Attach the bottom piece to the frame using screws or nails.
Step 5: Lining with Landscape Fabric
To prevent soil from escaping through the gaps in the wood, line the interior of the box with landscape fabric. Trim the fabric to fit neatly inside the box and secure it in place using staples or small nails.
Step 6: Adding Soil and Plants
Fill the flower box with potting soil, leaving about an inch of space below the rim. This space allows for easy watering. Choose a variety of plants that suit your aesthetic preferences and the amount of sunlight the box will receive. Consider a mix of flowers, trailing vines, or even herbs for a functional and fragrant addition.
Step 7: Maintenance and Care
Regular maintenance is essential for the health and vitality of your flower box garden. Water your plants as needed, keeping in mind that containers tend to dry out faster than traditional garden beds. Fertilize your plants according to their specific requirements. Prune and deadhead flowers to encourage new growth and maintain a tidy appearance.
Step 8: Painting or Staining (Optional)
If you want to add a pop of color or protect the wood from the elements, consider painting or staining your flower boxes. Choose a weather-resistant paint or stain and apply it according to the manufacturer’s instructions. Allow the boxes to dry completely before placing them outdoors.
Step 9: Placement and Enjoyment
Now comes the most rewarding part – placing your flower boxes in their designated spots and enjoying the beauty they bring to your surroundings. Whether they’re perched on a windowsill, adorning a balcony railing, or gracing your garden, these budget-friendly flower boxes are sure to enhance your outdoor space.
Conclusion:
Building flower boxes on a budget is a satisfying DIY project that adds charm and vibrancy to your outdoor living spaces. By following these step-by-step instructions, you can create beautiful planters that showcase your gardening skills and creative flair. Remember that the key to success lies in careful planning, accurate measurements, and attention to detail. With a few basic tools, affordable materials, and a touch of patience, you can enjoy the fruits – or rather, flowers – of your labor for seasons to come.