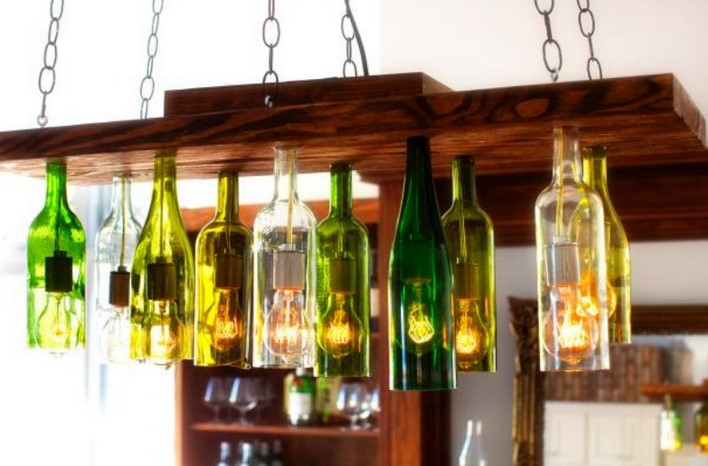
Bottle Wonders: Crafting a Bottle Light Fixture

Bottle Wonders: Crafting a Bottle Light Fixture is an innovative guide that explores the creative process of transforming ordinary bottles into extraordinary light fixtures. This guide provides step-by-step instructions on how to repurpose various types of bottles into unique and functional pieces of home decor. It emphasizes the importance of recycling and reusing materials, while also encouraging readers to tap into their artistic abilities. From selecting the right bottle to installing the final product, this guide covers every aspect of the crafting process, making it an invaluable resource for DIY enthusiasts and those interested in sustainable design.
Creating Magic at Home: How to Craft a Wine Bottle Light Fixture
Bottle wonders are a fascinating way to transform ordinary objects into extraordinary pieces of art. One such wonder is the wine bottle light fixture, a unique and creative way to illuminate your home. This article will guide you through the process of crafting your very own wine bottle light fixture, adding a touch of magic to your home decor.
The first step in creating a wine bottle light fixture is to gather the necessary materials. You will need a wine bottle, a light bulb, a lamp holder, a power cord, and a diamond drill bit. It’s important to choose a wine bottle that is not only visually appealing but also sturdy enough to hold the weight of the light bulb and lamp holder. The light bulb should be of a suitable wattage for the size of the bottle, and the lamp holder should fit snugly into the neck of the bottle. The power cord should be long enough to reach from the light fixture to the nearest power outlet, and the diamond drill bit is necessary for drilling a hole in the bottle for the power cord.
Once you have gathered your materials, the next step is to prepare the bottle. This involves thoroughly cleaning the bottle, both inside and out, and allowing it to dry completely. It’s also a good idea to remove the label from the bottle, as this can interfere with the light emitted by the bulb. If you wish to keep the label, consider placing it on the back of the bottle, where it won’t obstruct the light.
The next step is to drill a hole in the bottle for the power cord. This should be done carefully and slowly, using the diamond drill bit, to avoid cracking the bottle. The hole should be large enough for the power cord to pass through, but not so large that the lamp holder will fall through. Once the hole has been drilled, the power cord can be threaded through the hole and connected to the lamp holder.
The final step is to install the light bulb and test the fixture. The light bulb should be screwed into the lamp holder, and the power cord should be plugged into a power outlet. If the light bulb illuminates, then you have successfully crafted a wine bottle light fixture. If not, check the connections between the power cord and the lamp holder, and ensure that the light bulb is properly installed.
Crafting a wine bottle light fixture is a fun and rewarding project that can add a touch of magic to your home. Not only does it provide a unique source of light, but it also serves as a conversation piece and a testament to your creativity. With a little time and effort, you can transform an ordinary wine bottle into an extraordinary light fixture, creating a bottle wonder that will enchant your guests and illuminate your home in a truly magical way.